
Peppermint Semifreddo
Peppermint Semifreddo-adapted from Martha Stewart recipe
Semifreddo is an Italian dessert that is a hybrid of ice cream and custard. This takes only about 45 minutes to put together and another 1 ½ hours to set up. The only drawbacks are crushing all the peppermint candies and using a multitude of large mixing bowls. I tell you, this is completely worth it.
I did reference this recipe in my December newsletter. It is worth repeating and I actually made it for this entry and would rather be eating a serving than doing my work. Truly, one of the best things I have EVER EATEN!
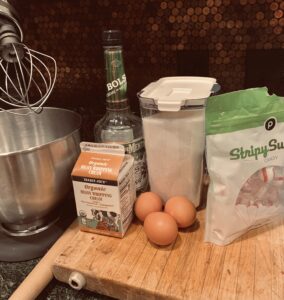
Ingredients:
-4 ounces of peppermint candy. I prefer the softer pillow type as the starlight mints are a bear to crush up.
-1 ½ cups heavy whipping cream
– 3 eggs, separated
-6 tbsps sugar
-6 tbsps peppermint liqueur
Directions:
- Unwrap the candies and put in a plastic bag. Put a dish-towel over and crush with a wooden rolling pin. After much banging and crushing, I put my large chips into a small food processor and successfully made a nice textured fine peppermint concoction.
- Use all but 3 tablespoons and add to the whipping cream. Whip till stiff peaks form. Chill until ready to use.
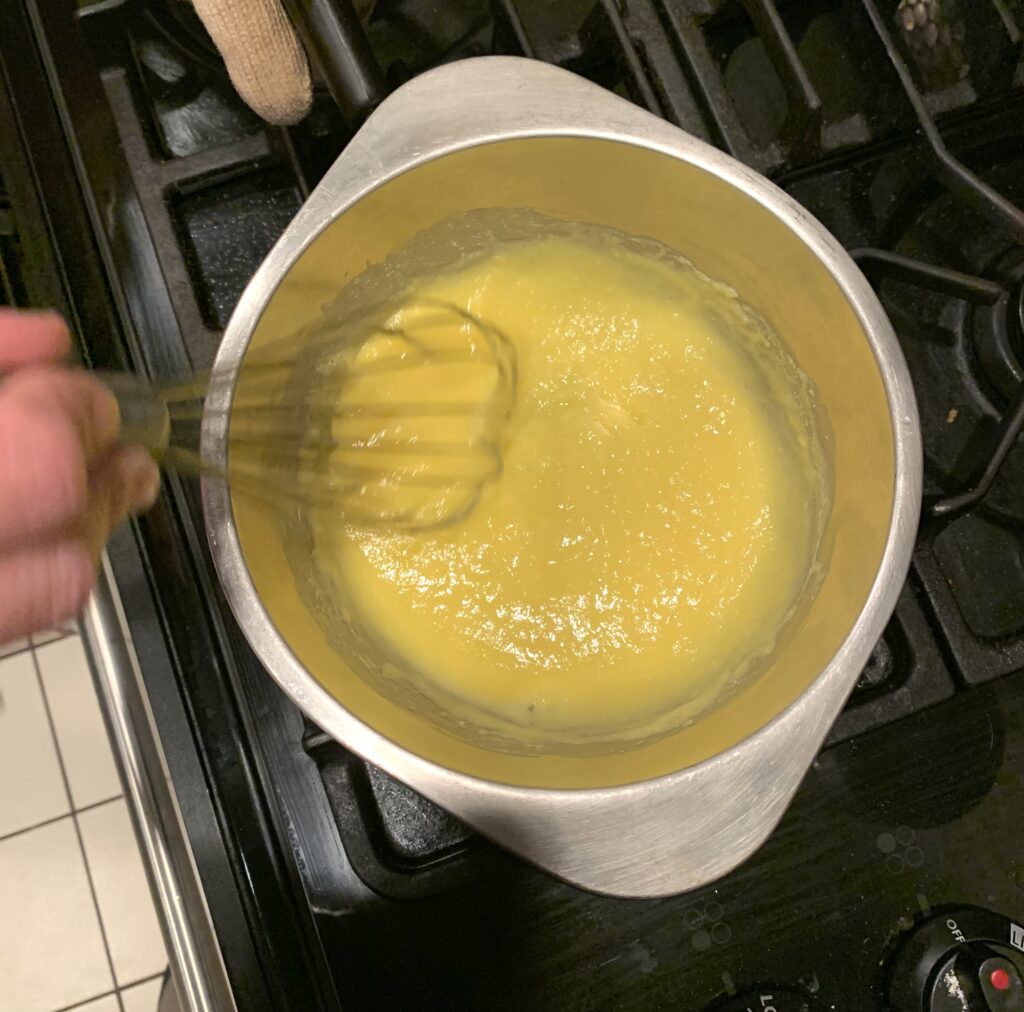
- Prepare an ice bath. Place a metal bowl over a pan of simmering water. Save this simmering pan of water for the next step. Whisk the egg yolks with 2 tbsps of sugar. Whisk constantly and do not allow the eggs to scramble. I found myself removing from the heat and then putting it back on, lowering the heat as necessary. Whisk a minute or two and then add the liqueur. Whisk vigorously until mixture is thick. Transfer the bowl to the ice bath, whisking until cool.
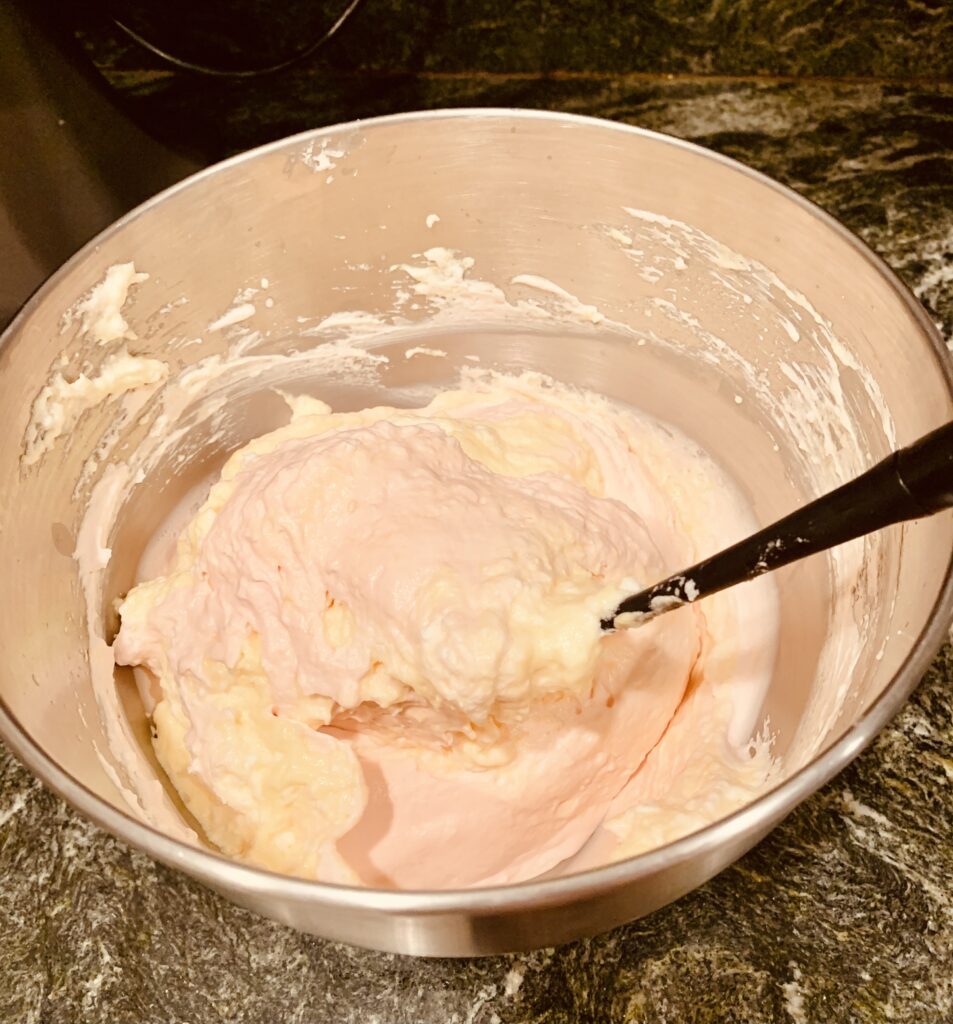
- In a metal mixing bowl outfitted for your mixer, whisk the egg whites and remaining 4 tbsps of sugar till sugar dissolves and mixture is warm to touch, about 2 minutes. Attach bowl to mixer and beat until stiff and glossy peaks form.
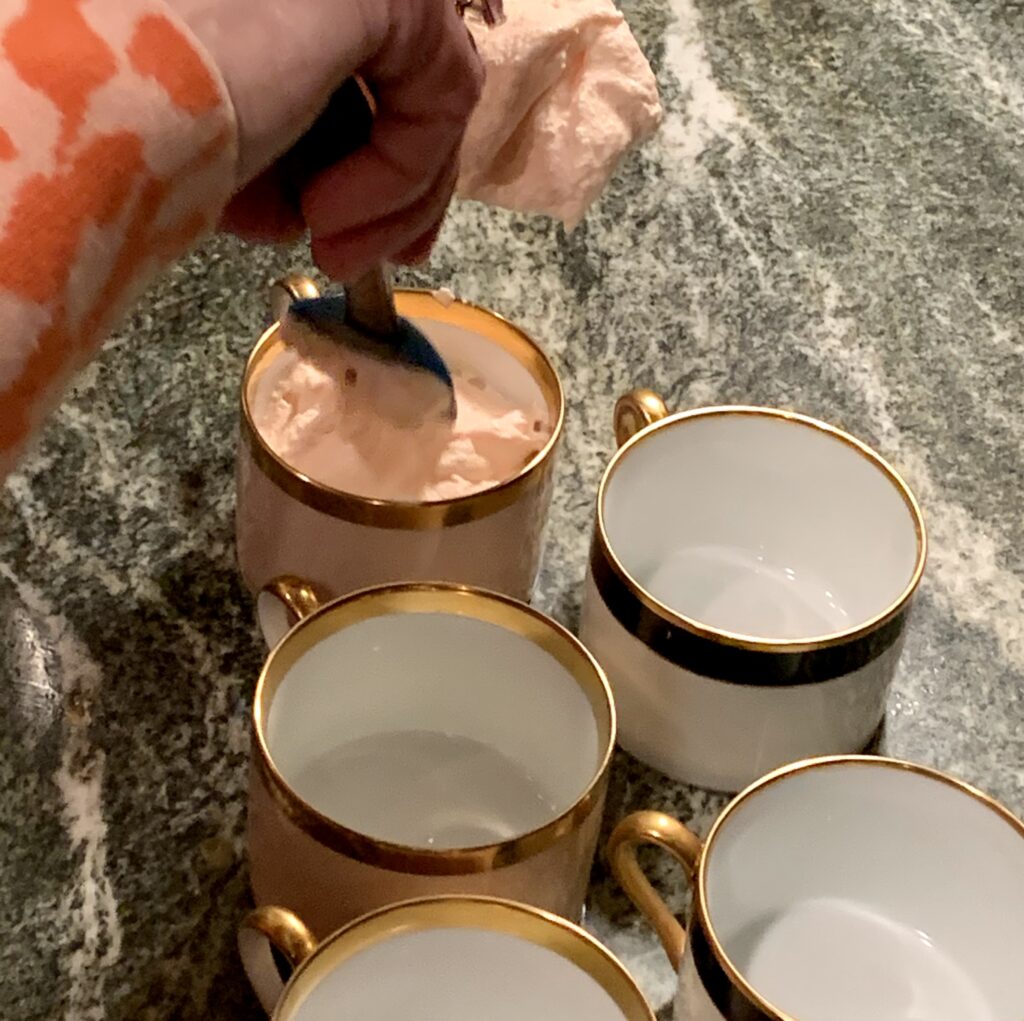
- Fold the egg white mixture into the egg yolk mixture on third at a time. Fold in the whipped cream mixture. Spoon this gorgeous creation into six serving dishes. Freeze until firm, 1 ½ hours.
- Serve with chocolate sauce and sprinkle the remaining crushed candy on top. If you don’t consume every bite, call me immediately. I will be there quickly! You can store in airtight containers and might want to cover with saran wrap and touch it carefully to top of dessert so a film doesn’t form. I have never had any to store…ever!
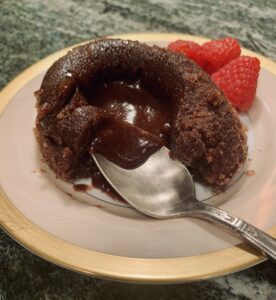
Molten Lava Cakes- for two
This is the perfect solution for Valentine’s dessert for two! Bonus, it’s gluten-free! Super bonus, it takes 10 minutes to put together and 10 minutes to bake!
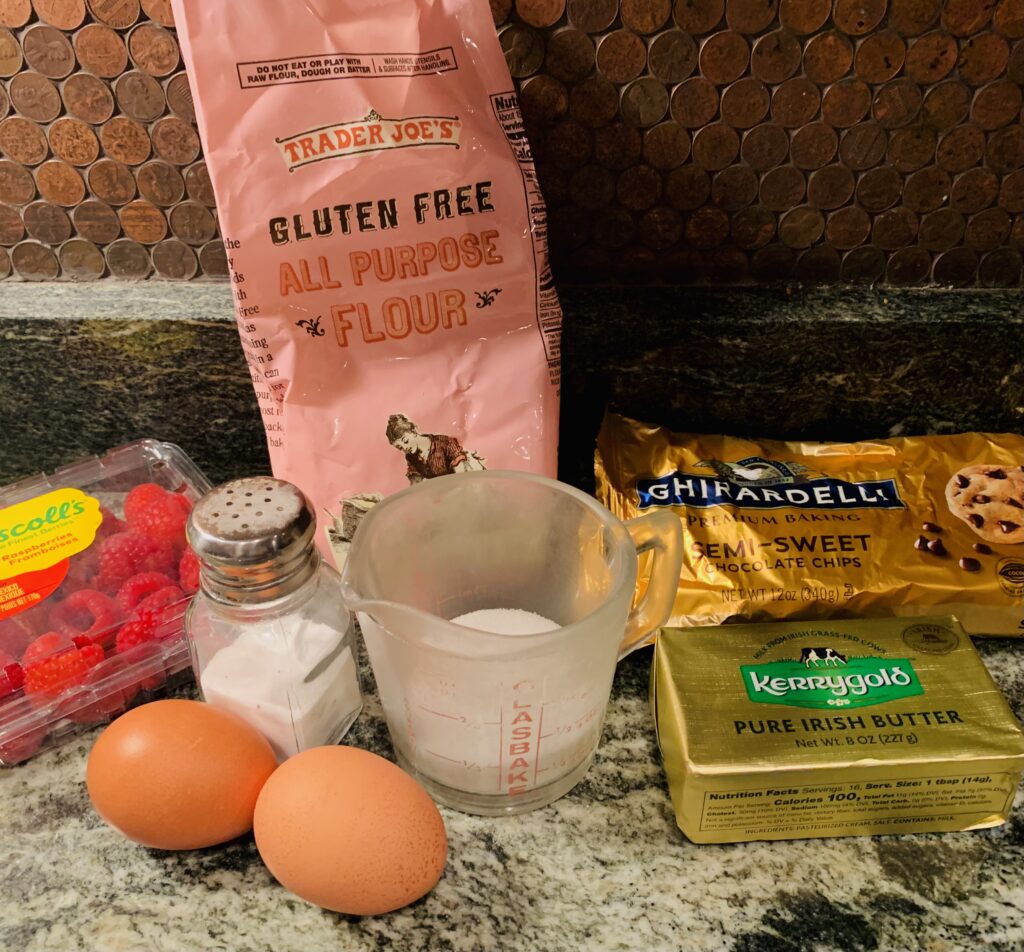
Ingredients:
-2 tbsp butter
-1/3 cup sugar
-2 ounces semi-sweet chocolate
-1 large egg
-1 egg yolk
-1 pinch of salt
-3 tbsp gluten-free flour (almond or rice is what I prefer)
a little extra butter to coat ramekins and a little extra sugar to coat them
Preheat oven to 400°
Directions
- Butter ramekins thoroughly and dust with sugar.
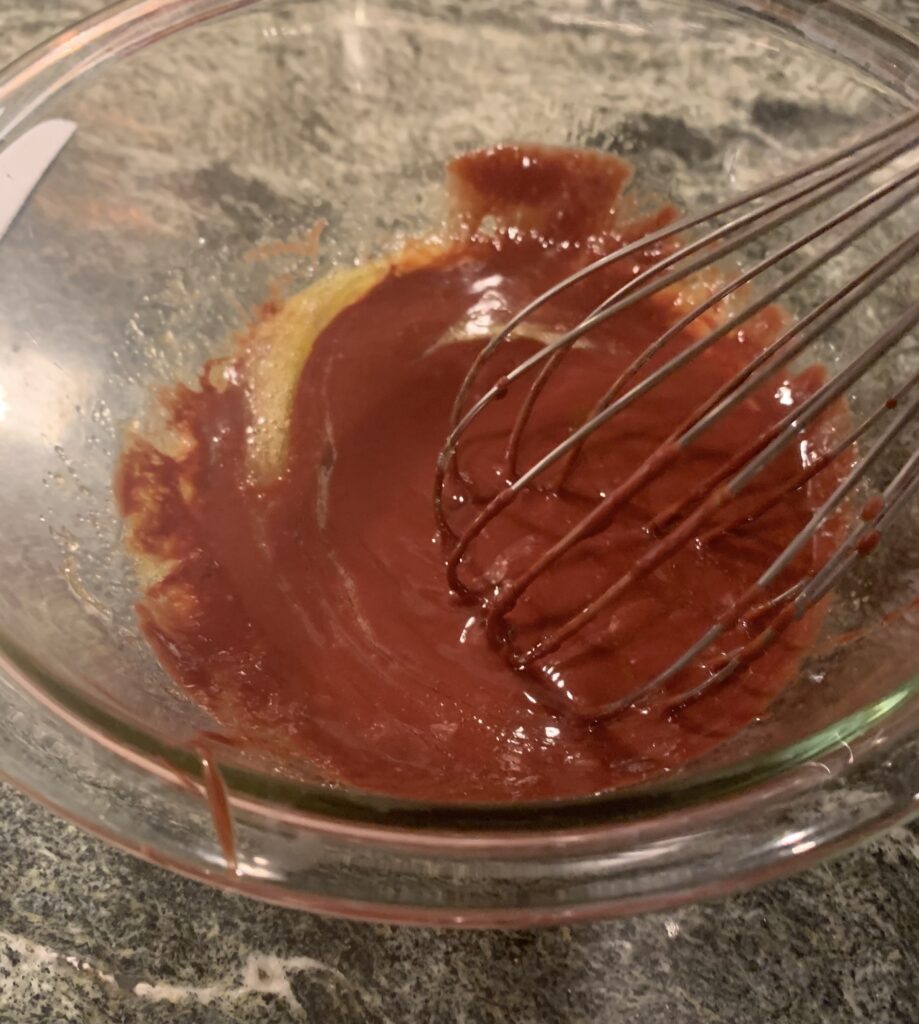
- Melt the butter and chocolate in 20-second increments in a microwave, stirring between each heat.
- In a separate bowl, whisk together the eggs, sugar, and salt.
- Mix all the above ingredients.
- Add the flour, whisk just until combined.
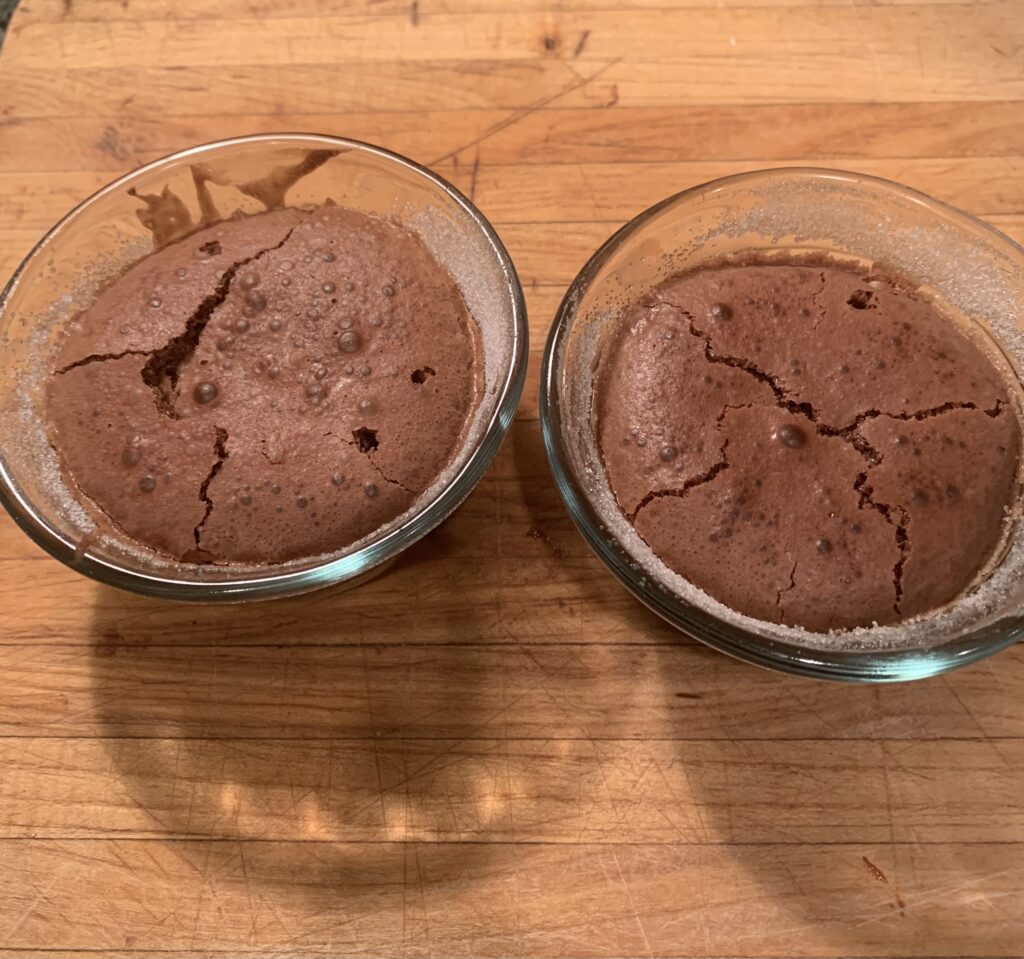
- Bake for 10-12 minutes until a toothpick inserted ½ “ from the side of the ramekin comes out clean.
- Let sit for 10 minutes to cool.
- Invert and serve with whip cream, berries, or ice cream.
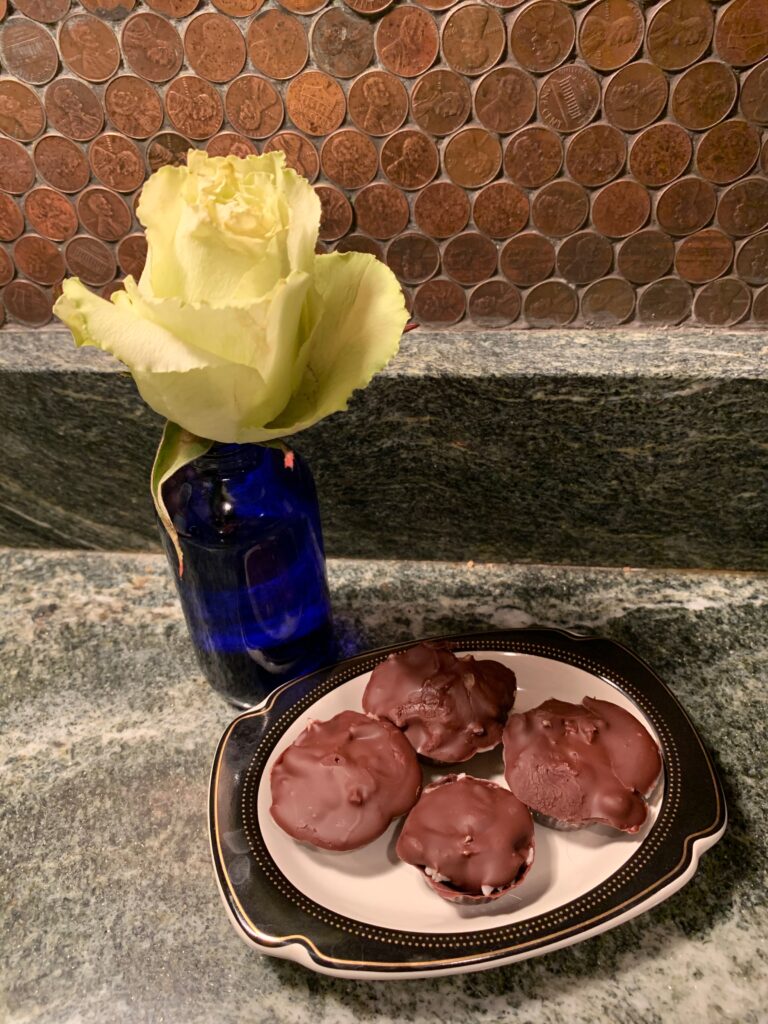
Mounds Candy Bites-gluten/dairy free too!
These are little bite size treats that are easy to make and you can
knock out about 3 dozen in an hour. I am one of “those” that avoid dairy and gluten, but that is a story for later.
The only odd item that you need are candy molds. I found them at
Michael’s. (Wilton brand) Just indulge and buy three, It will be a huge
time saver. The one complaint I have about the molds is that they make 11 individual candies. Say what? Why not make the mold so it makes a dozen? I made mine with dark chocolate, but you might want to use milk chocolate or even a combination. I use GOOD chocolate! Just do it.
Ingredients and supplies:
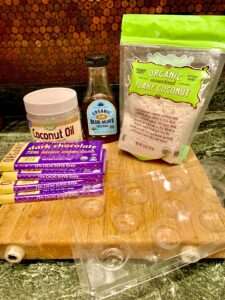
-Three “peanut butter cup” candy molds
-Small paintbrush that has not been used with paint
-1 cup or more of dark chocolate 73. I used four bars
-1 cup finely ground unsweetened coconut
-1/2 cup coconut oil
-1 tbsp agave nectar-careful, this stuff is sweet

- Break up the chocolate into a large microwave safe measuring
cup and microwave in 20-30 second increments, making sure
to stir well after each increment, until melted and smooth. You
can also melt in a double broiler. Do not heat all at once or it
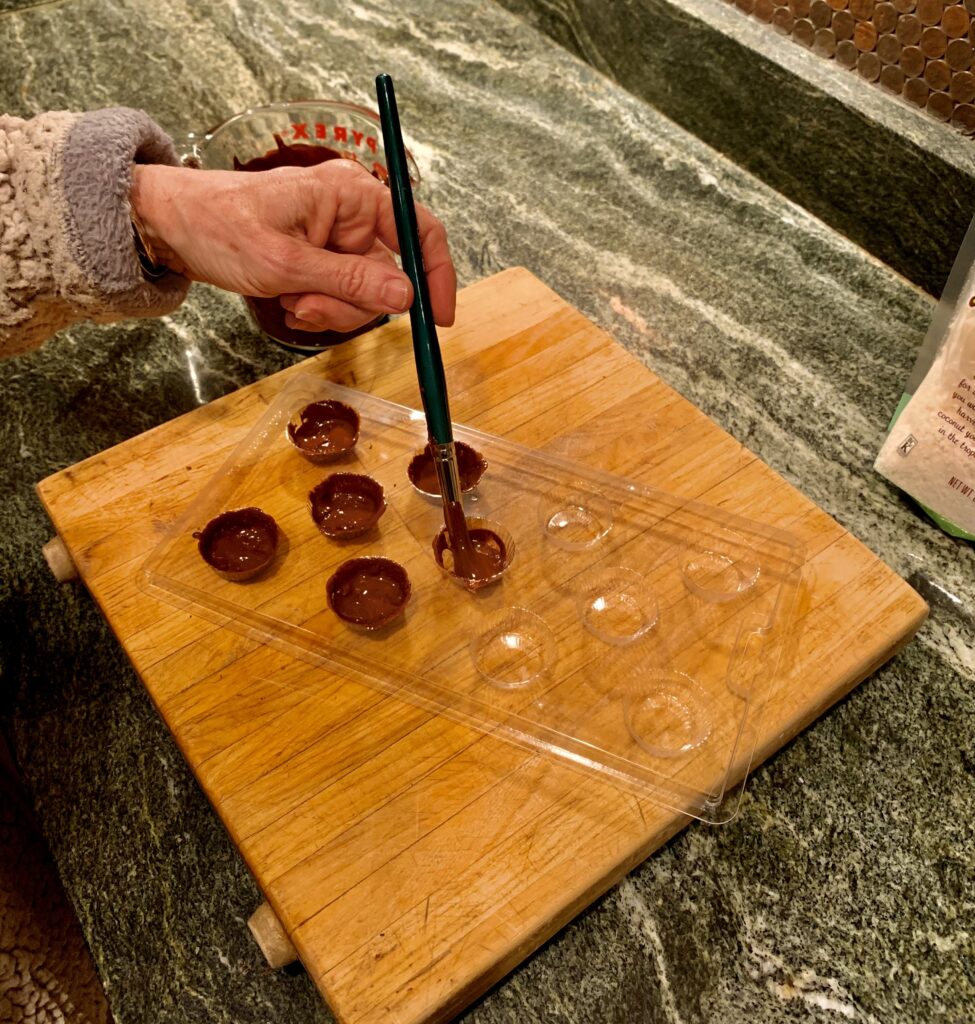
will become lumpy and seize and loose its gorgeous shine. - With the small paintbrush, coat the bottom and sides of the
candy molds. - Place molds in freezer for 10 minutes to allow chocolate to
harden. - Remove from freezer, and if you see holes in the chocolate,
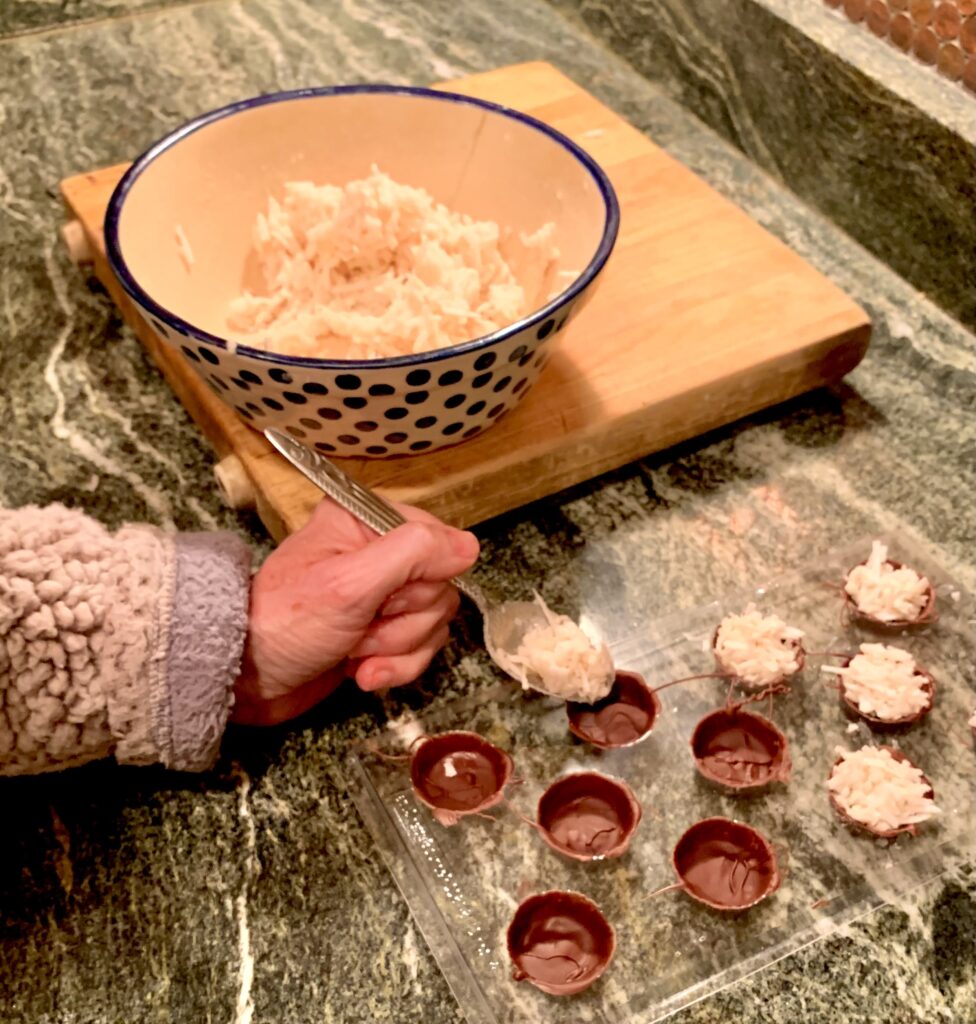
paint more on and freeze for another 10 minutes. - While chocolate is freezing, shred the cocoanut if necessary in
a small food processor. I skipped this step and that was a
mistake. Slowly melt the coconut oil in the microwave so it is
liquid Mix in the agave and coconut oil. Taste and adjust flavor
if necessary. - Fill chocolate lined molds with coconut mixture.
- Place molds in freezer for another 10 minutes.
- Remove and paint chocolate over the coconut mixture to cover
the candies. - Place in freezer for 10 more minutes.
- Remove from freezer. Turn upside down and pop candies out
of the molds. - Serve. You should store extras in the refrigerator.
